
New feature
Invite tenants to complete an inspection in FieldSeen

Before you start
- Plan
- Professional in a company workspace
- Works on
- Desktop and phone; tenants use their own device
- You’ll need
- Tenant-management permission and a tenant contact with a valid email
Collect a tenant's inspection in the same property record your team uses. FieldSeen lets you invite a tenant to document room conditions, notes, and photos from their own device, then submit the inspection without creating an account.
This walkthrough shows how to send the invitation on desktop or phone and what the tenant does next. All screenshots use the current interface with entirely fictional demo information and a drawn demo signature.
Tenant invitations require Professional in a company workspace and permission to manage tenants. Company owners and admins have that permission. Start with an active property and a tenant contact with a valid email. For a property with multiple units, link the tenant to the correct unit first. Creating invitations requires an internet connection; personal workspaces do not support this workflow.
Invite the tenant on desktop
5 steps Desktop
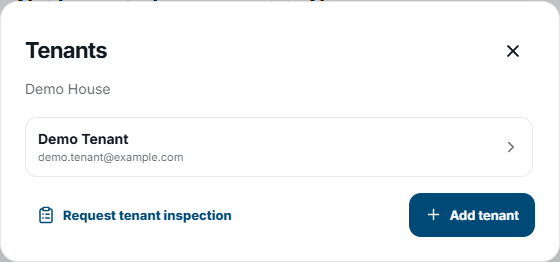
- Open the property. In Contacts, find Tenants for a single-family property or Units & tenants for multiple units, then select Manage.
- For a property with multiple units, open the relevant unit's tenant details.
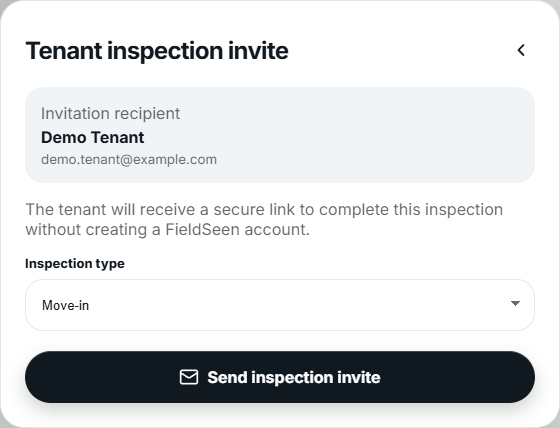
- Select Request tenant inspection. If several tenants are eligible, select the intended recipient. If only one is eligible, FieldSeen opens their invitation directly.
- In Tenant inspection invite, check the recipient name and email. Choose Move-in, Routine, or Move-out under Inspection type.
- Select Send inspection invite.
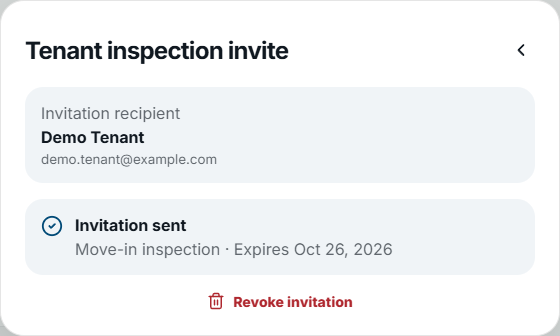
The invitation screen then shows Invitation sent, the inspection type, and the expiry date. Check these details before closing it. The interface status does not prove that the email reached the tenant's inbox or that they opened it.
Invite the tenant from your phone
3 steps Phone
- Open the property and tap Tenants for a single-family property or Units & tenants for multiple units. Open the relevant unit when needed.
- Tap Request tenant inspection and choose the recipient if FieldSeen offers a choice.
- Check the recipient in Tenant inspection invite, choose the Inspection type, then tap Send inspection invite.
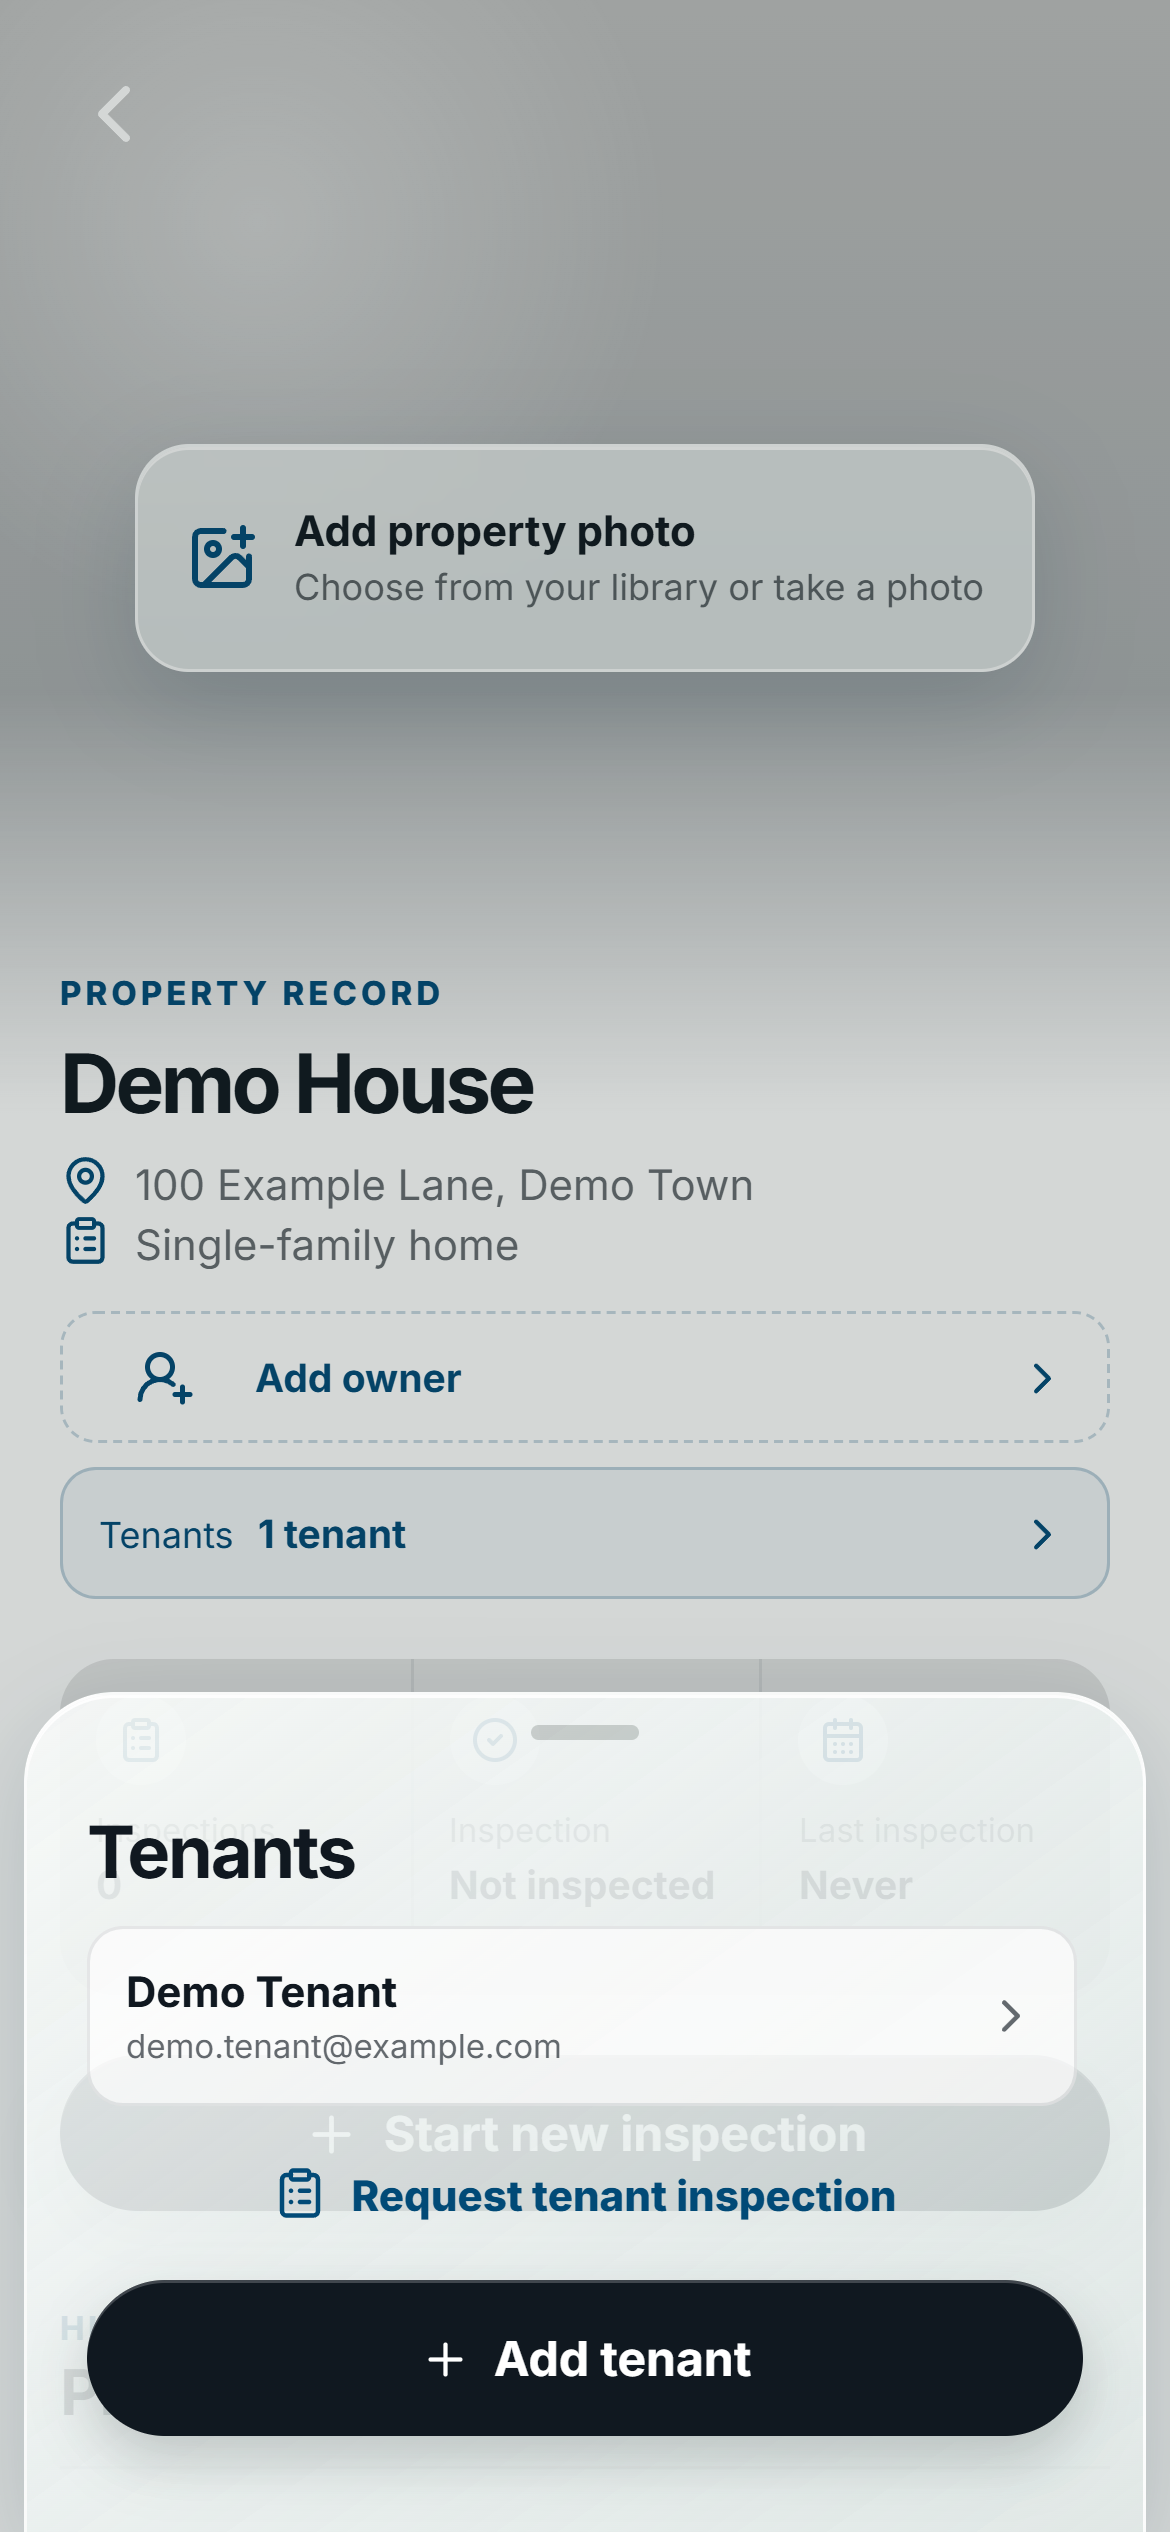
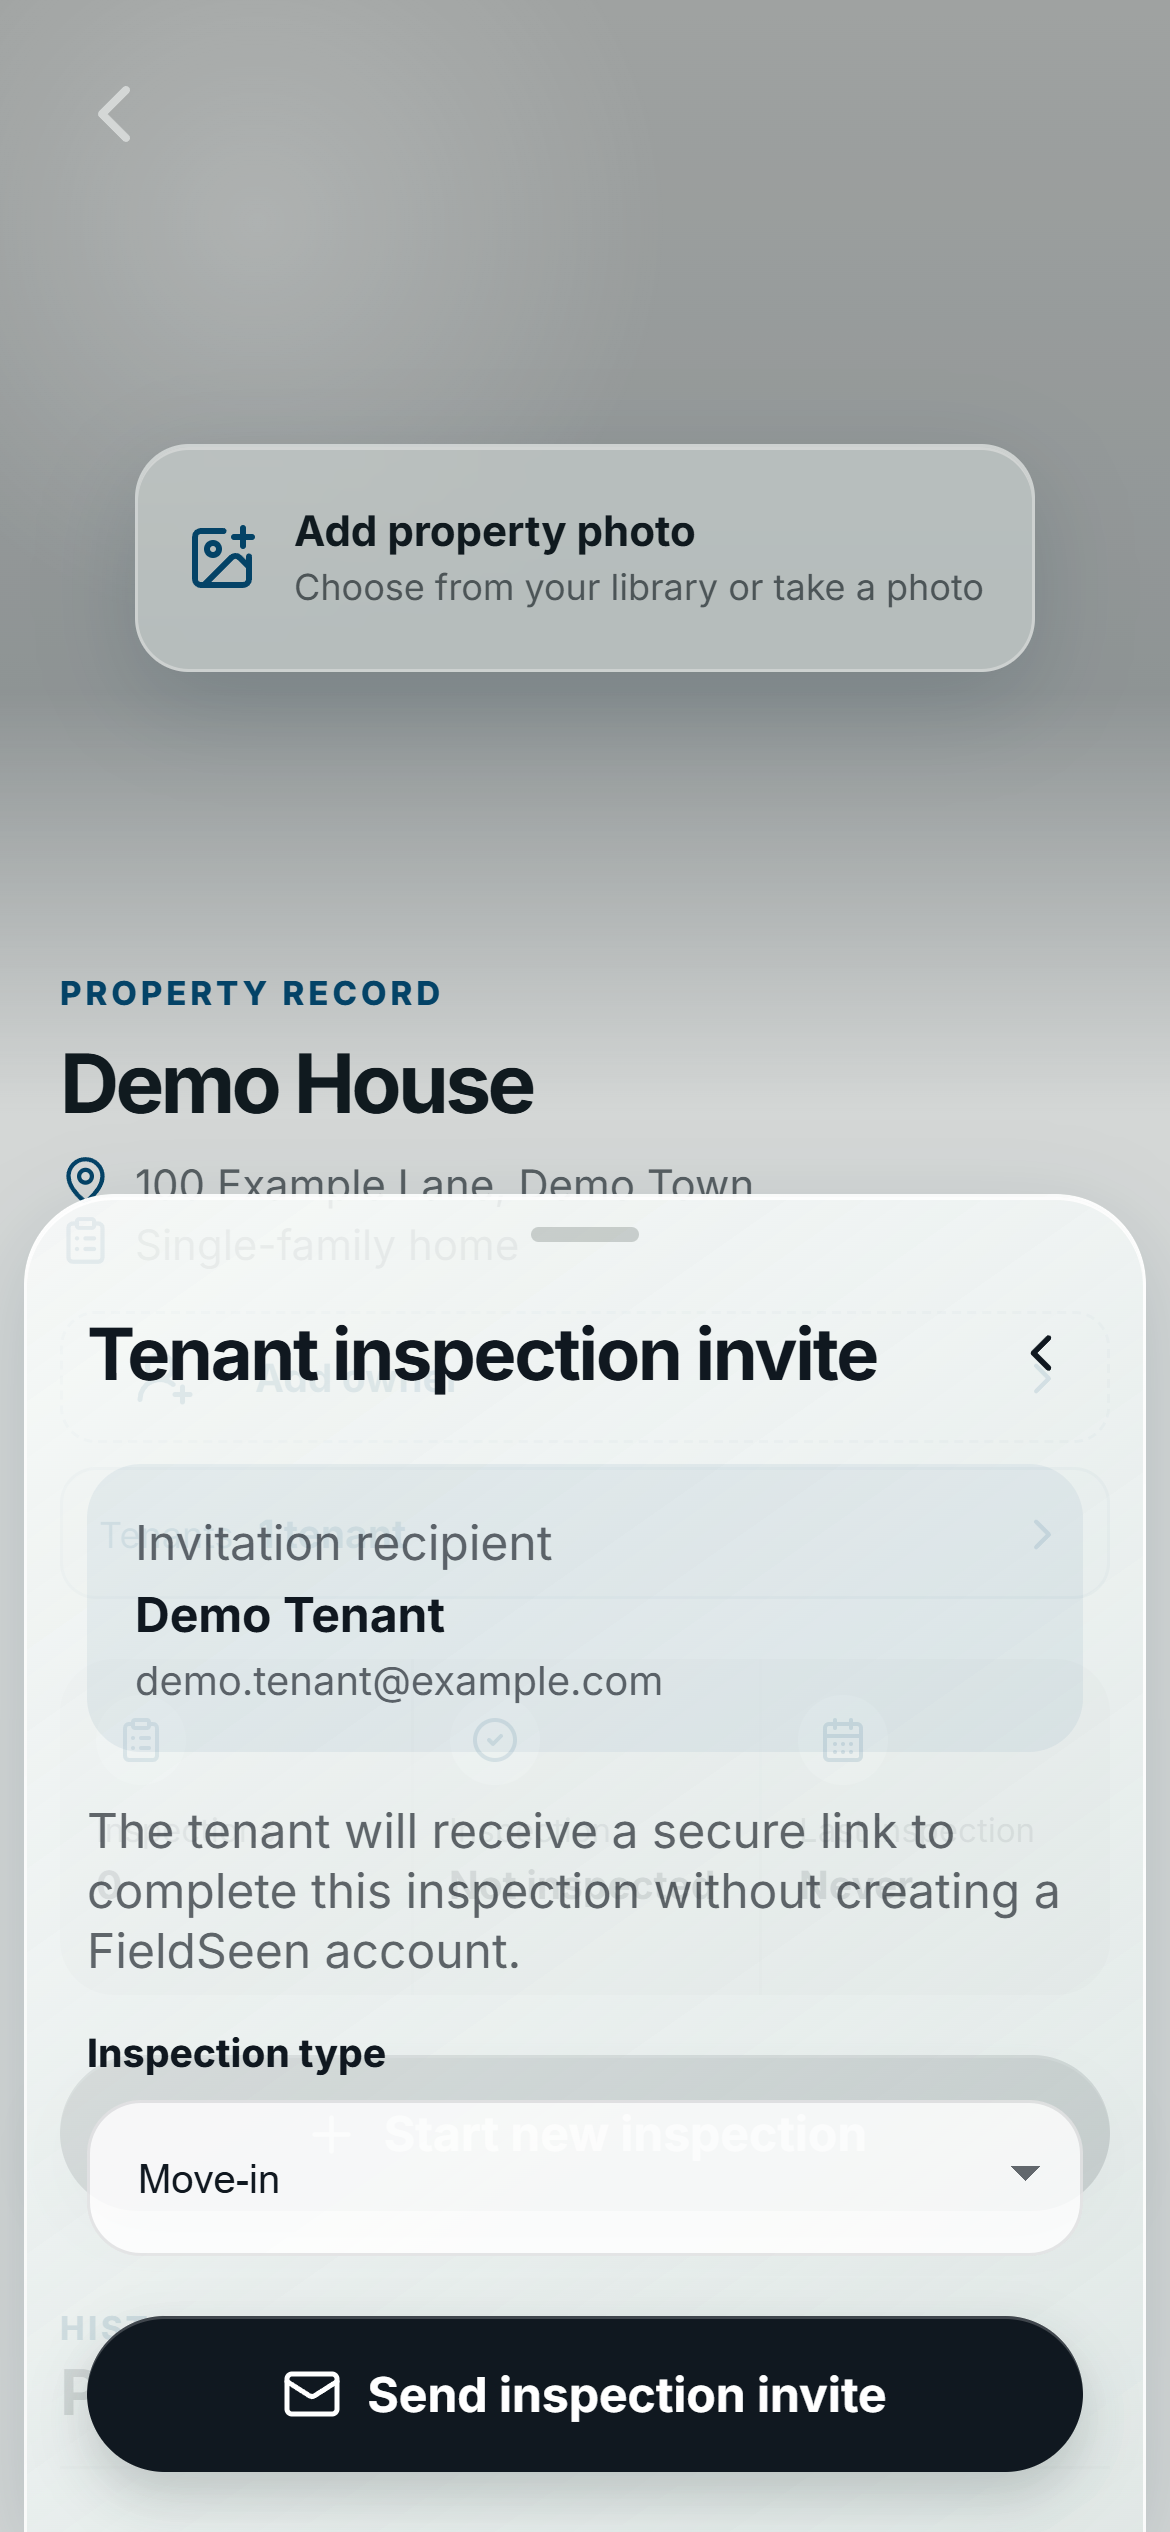
If the tenant is not listed, use Add tenant to create their contact and assign the unit where applicable. An email is optional for storing a tenant contact, but a valid email is needed for an invitation. Edit an existing contact if the address is missing or incorrect, then return to the invitation.
The tenant opens their inspection link
3 steps Tenant
- Open the invitation link in the email. Check the property and unit shown on the entry screen.
- Read the notice explaining that the photos, notes, and completion time will be shared with the property team under the invitation's recorded name and email.
- Select Start inspection. An inspection already started offers Resume inspection.
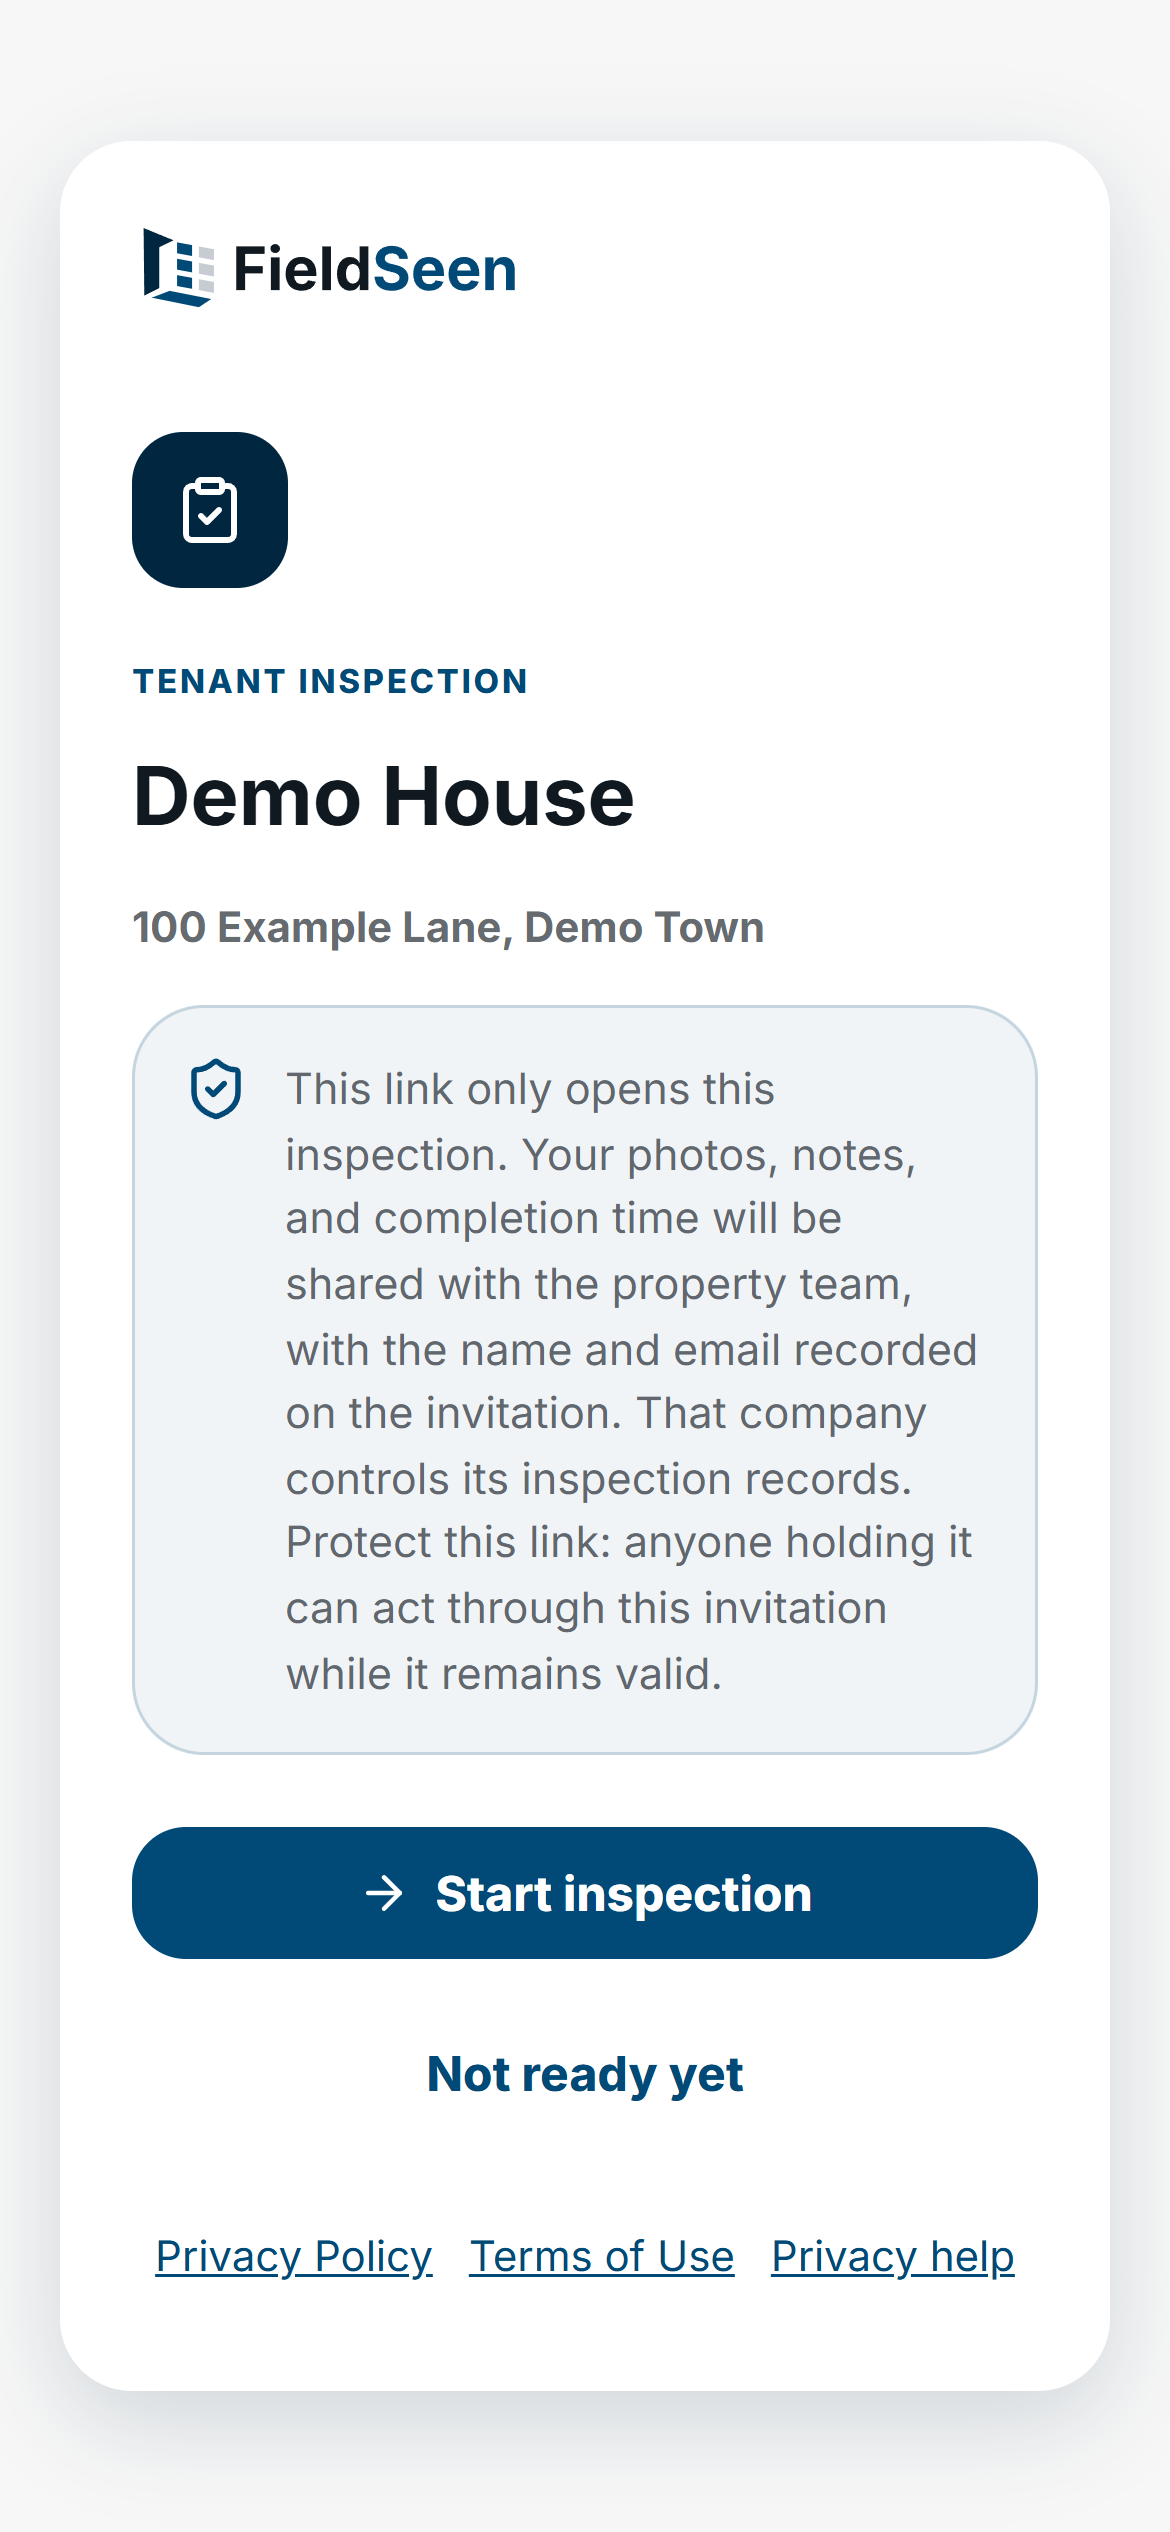
The link opens this inspection, not a general tenant portal. Keep the email private: anyone holding a valid link can act through that invitation. The link does not independently verify who is using it.
Record and save the room details
4 steps Tenant
- Add the rooms or areas you need to document, then open a room.
- Choose its condition: Good, Needs attention, Damaged, or Not inspected.
- Add useful notes and supporting photos. Take photos opens the camera; thePhoto library lets you select existing images where supported.
- Select Save area details, then continue through the remaining rooms.
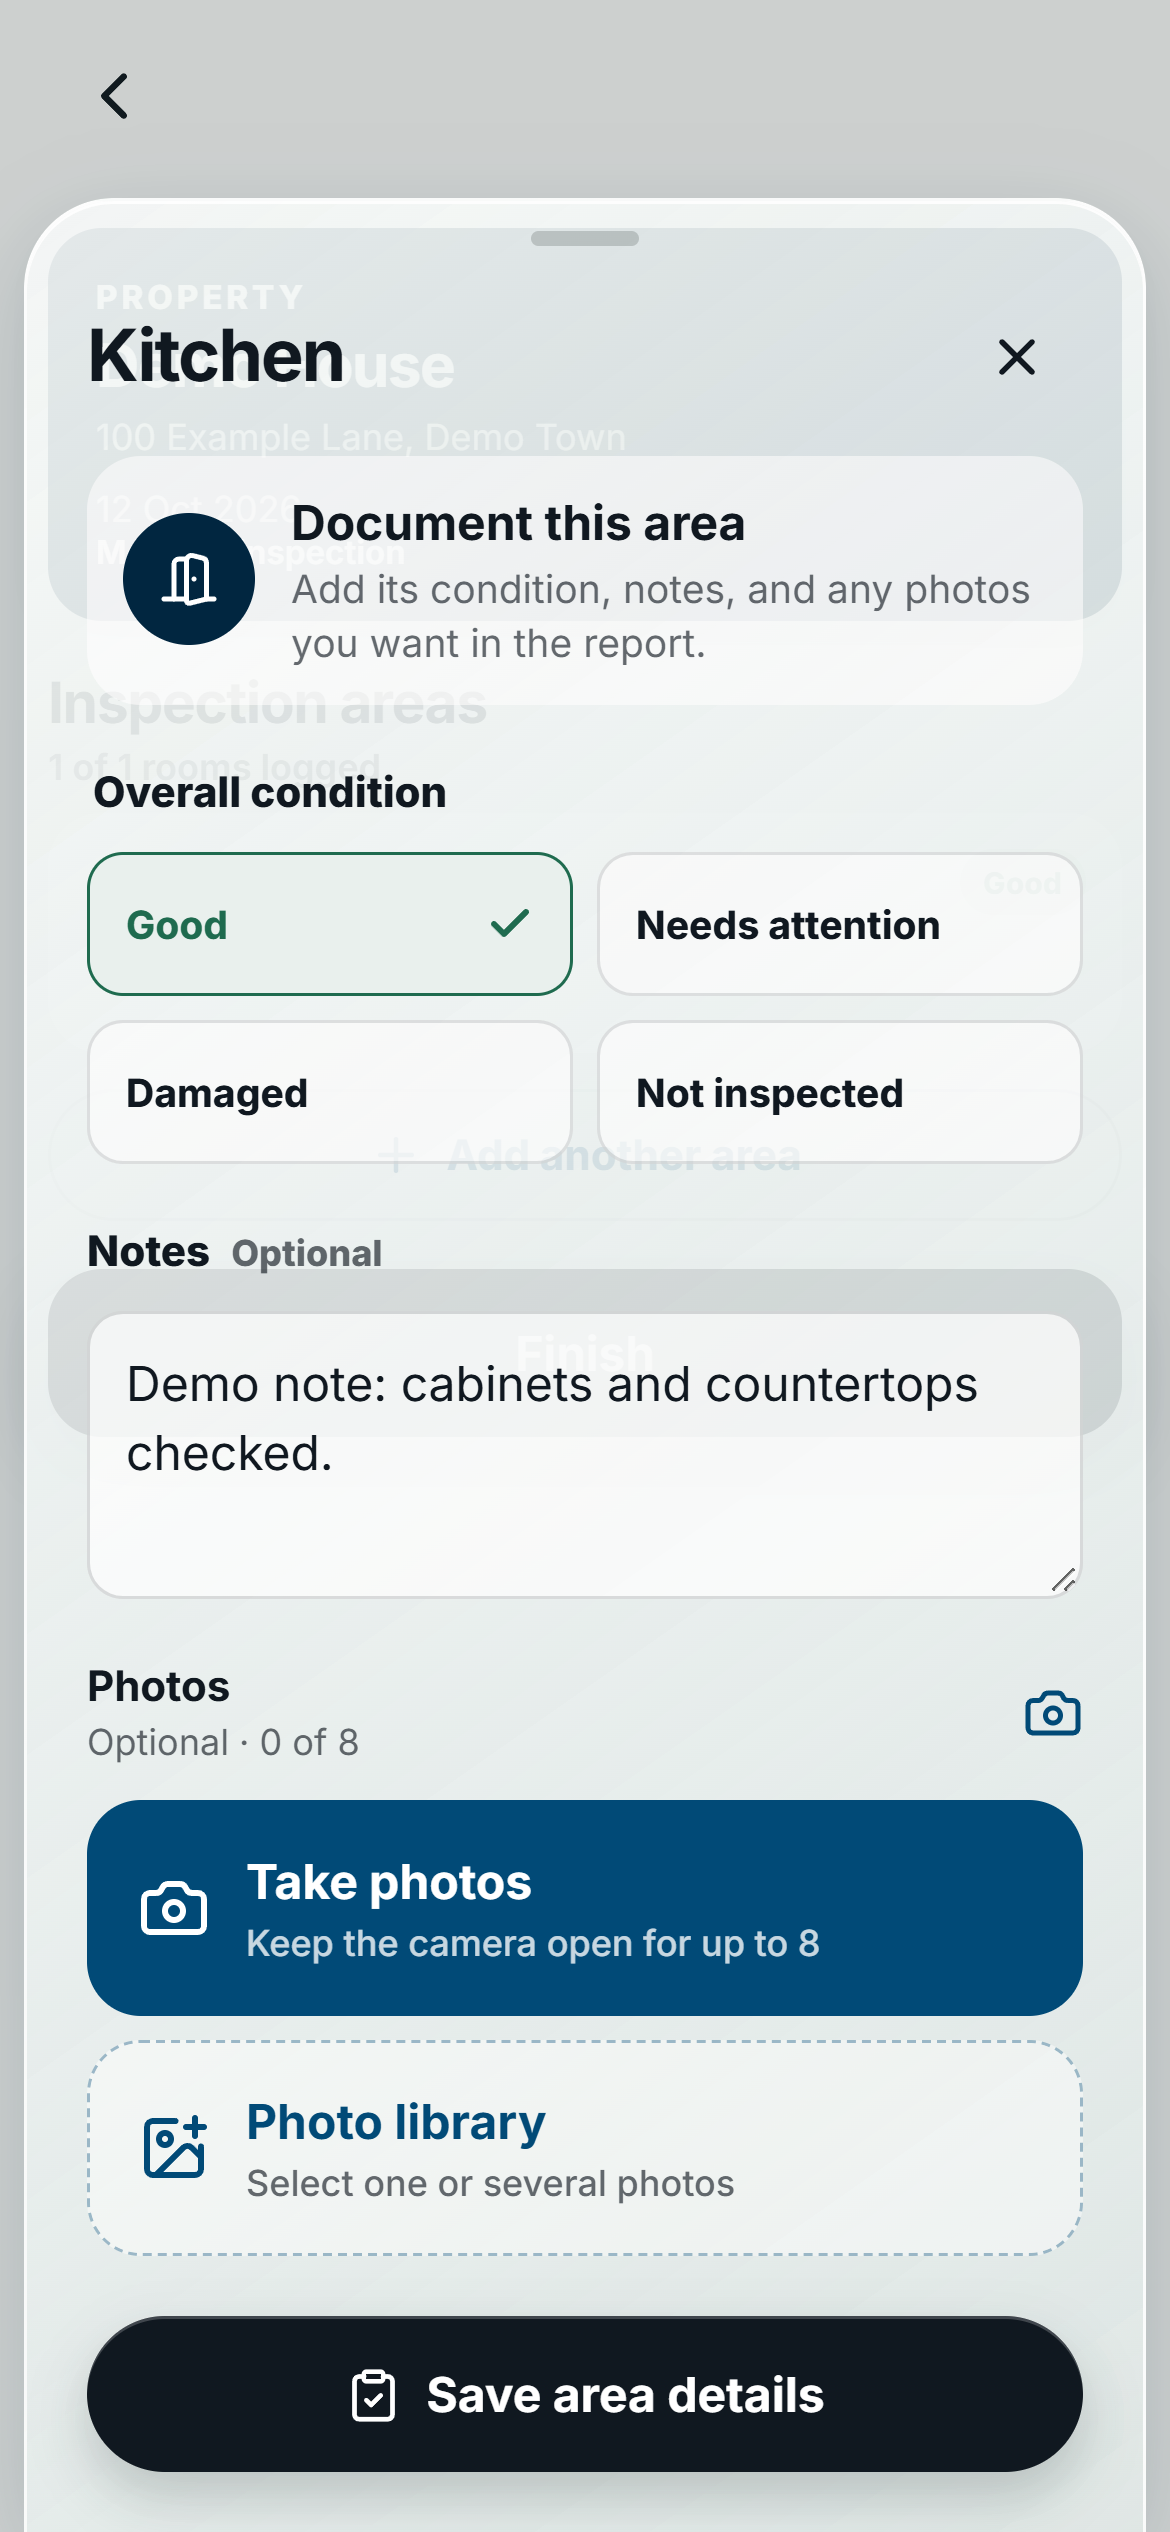
A condition is required to save the room. Notes and photos make the record more useful, but FieldSeen does not require a photo or note for every room. Before finishing, add at least one area and save the details for each area you include. Use Not inspected honestly when you could not inspect an area.
For example, “small mark beside the kitchen door” with a clear photo gives the property team more to review than “wall issue.” Our move-in photo guide explains how to capture room context and closer details. Tenant inspections do not use the reusable staff checklists.
Understand saved work and resuming
The first opening needs an internet connection. Saving a room stores its notes and compressed photos on that device before upload, so a slow upload does not hold up the next room. Keep the page active and check its synchronization state.
Reopening or reloading on the same device and browser can restore saved work while the invitation remains valid. Previously opened work may be reopened offline within that boundary, but unsynchronized work is not protected from browser storage clearing, eviction, or device loss. Another device's checkout can cause a conflict; FieldSeen does not automatically merge both devices' local changes.
Uploads resume while the page is active or reopened. Do not assume they continue after a browser suspends or closes the page. A local save or pending submission is not the same as a completed inspection received by the property team.
Sign and submit the inspection
4 steps Tenant
- After saving all included rooms, select Finish or the inspection's Submit control.
- In Sign and submit, read the acknowledgment, enter your Full name, and draw your Signature. Use Clear to redraw if needed.
- Add Final comments if needed, then select Sign and submit.
- Wait for the Inspection submitted thank-you screen before treating the inspection as received by the property team.
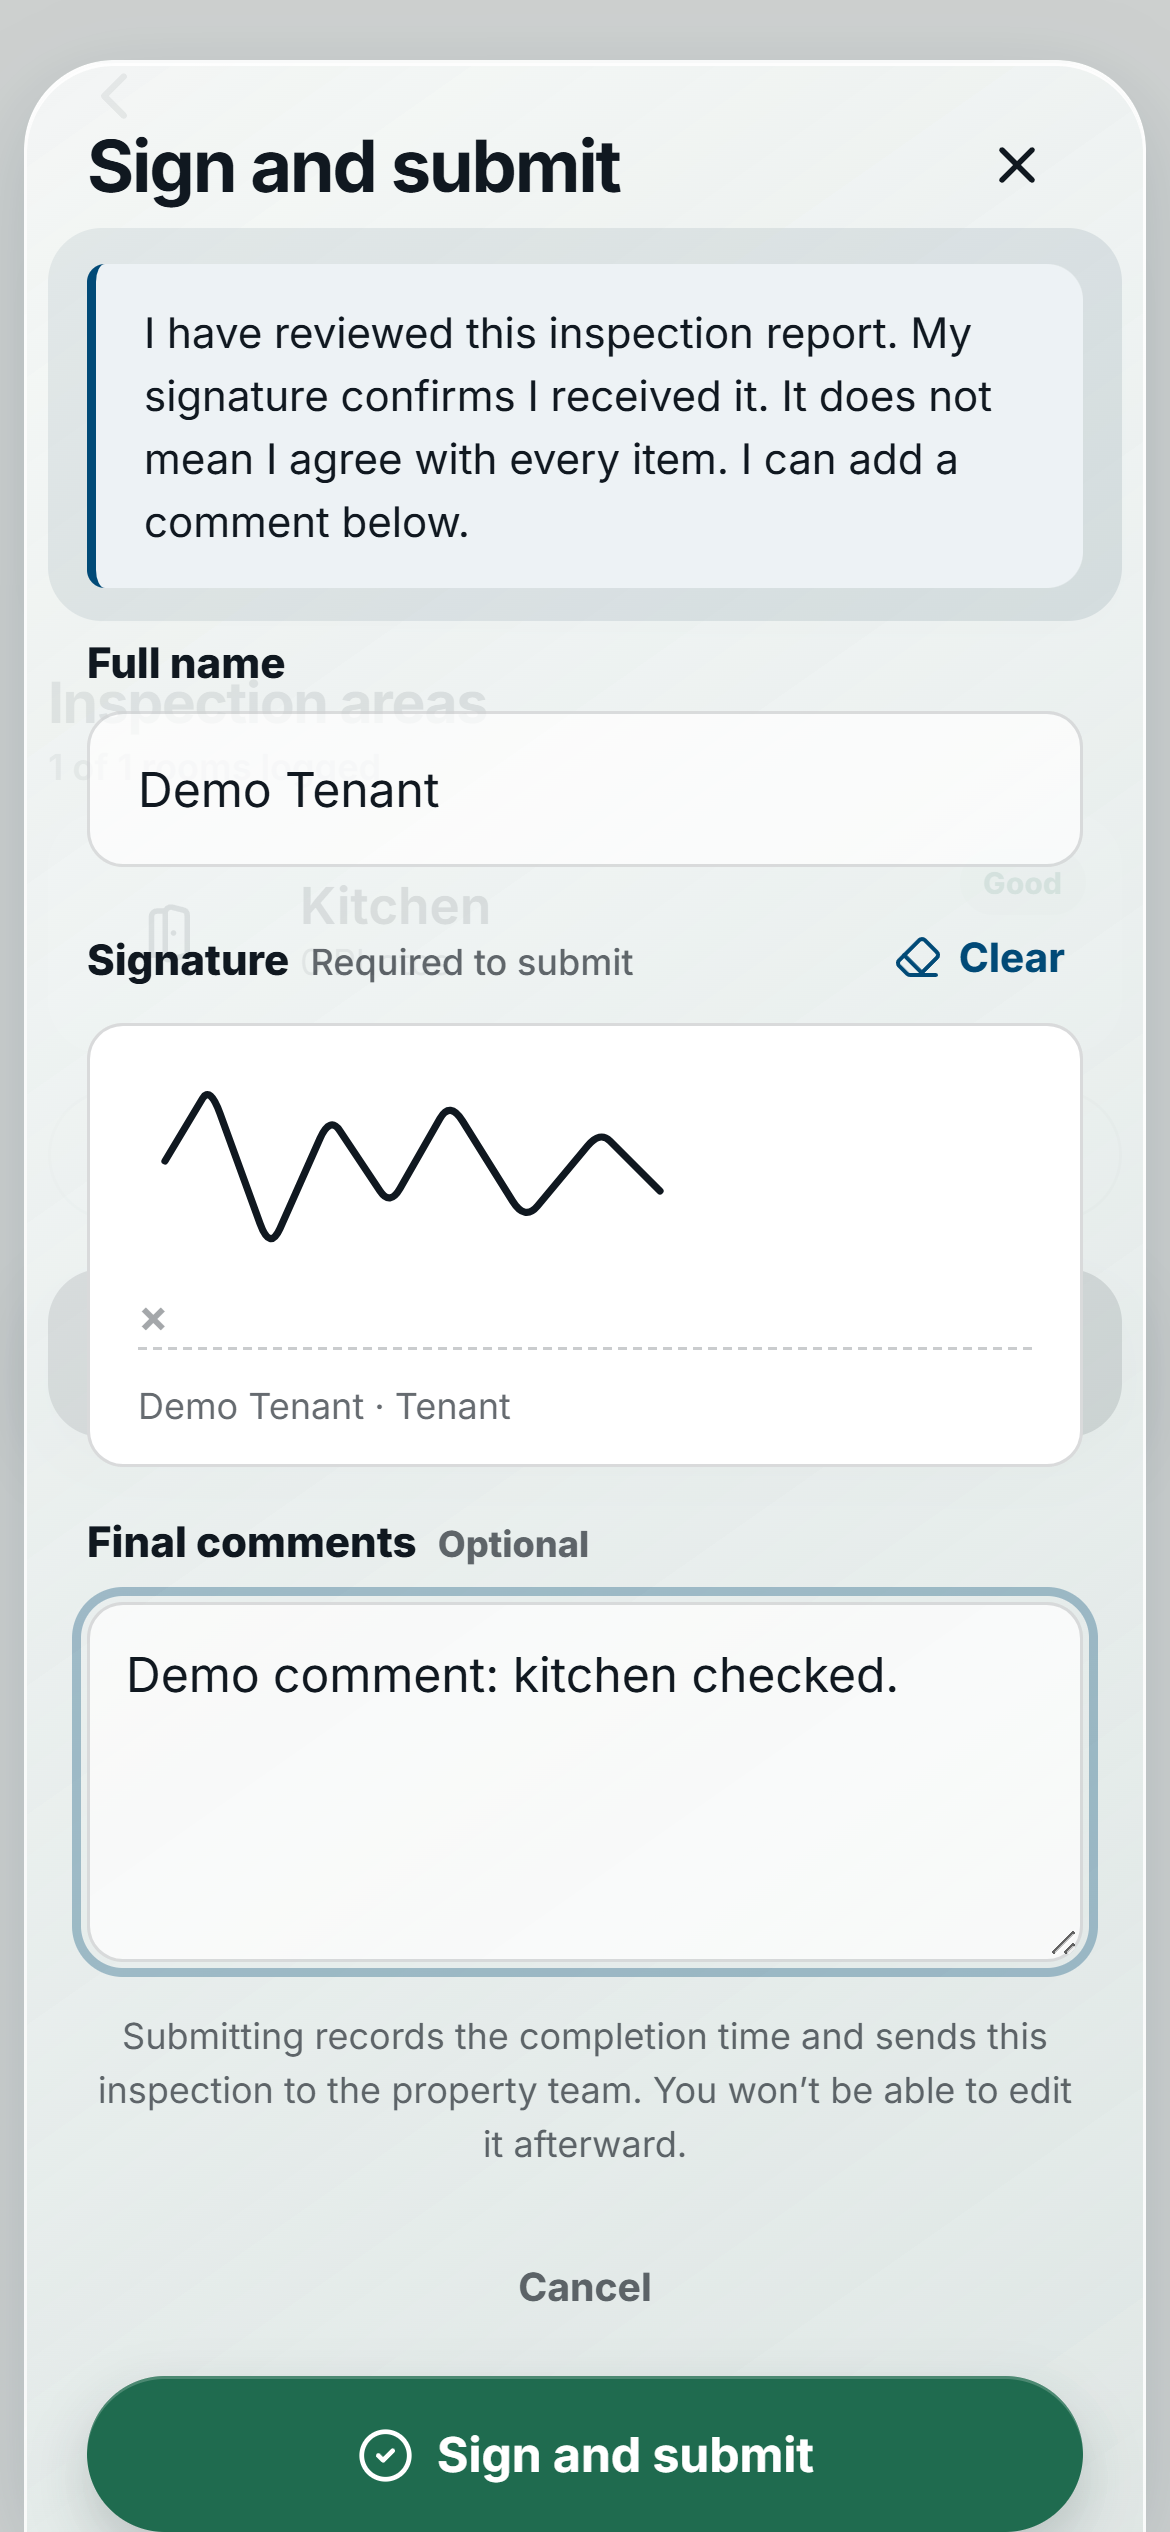
The signature confirms receipt of the report, not agreement with every item. Submitting records the completion time and makes the inspection uneditable. Submission may wait for synchronization; the thank-you screen appears only after server acknowledgment.
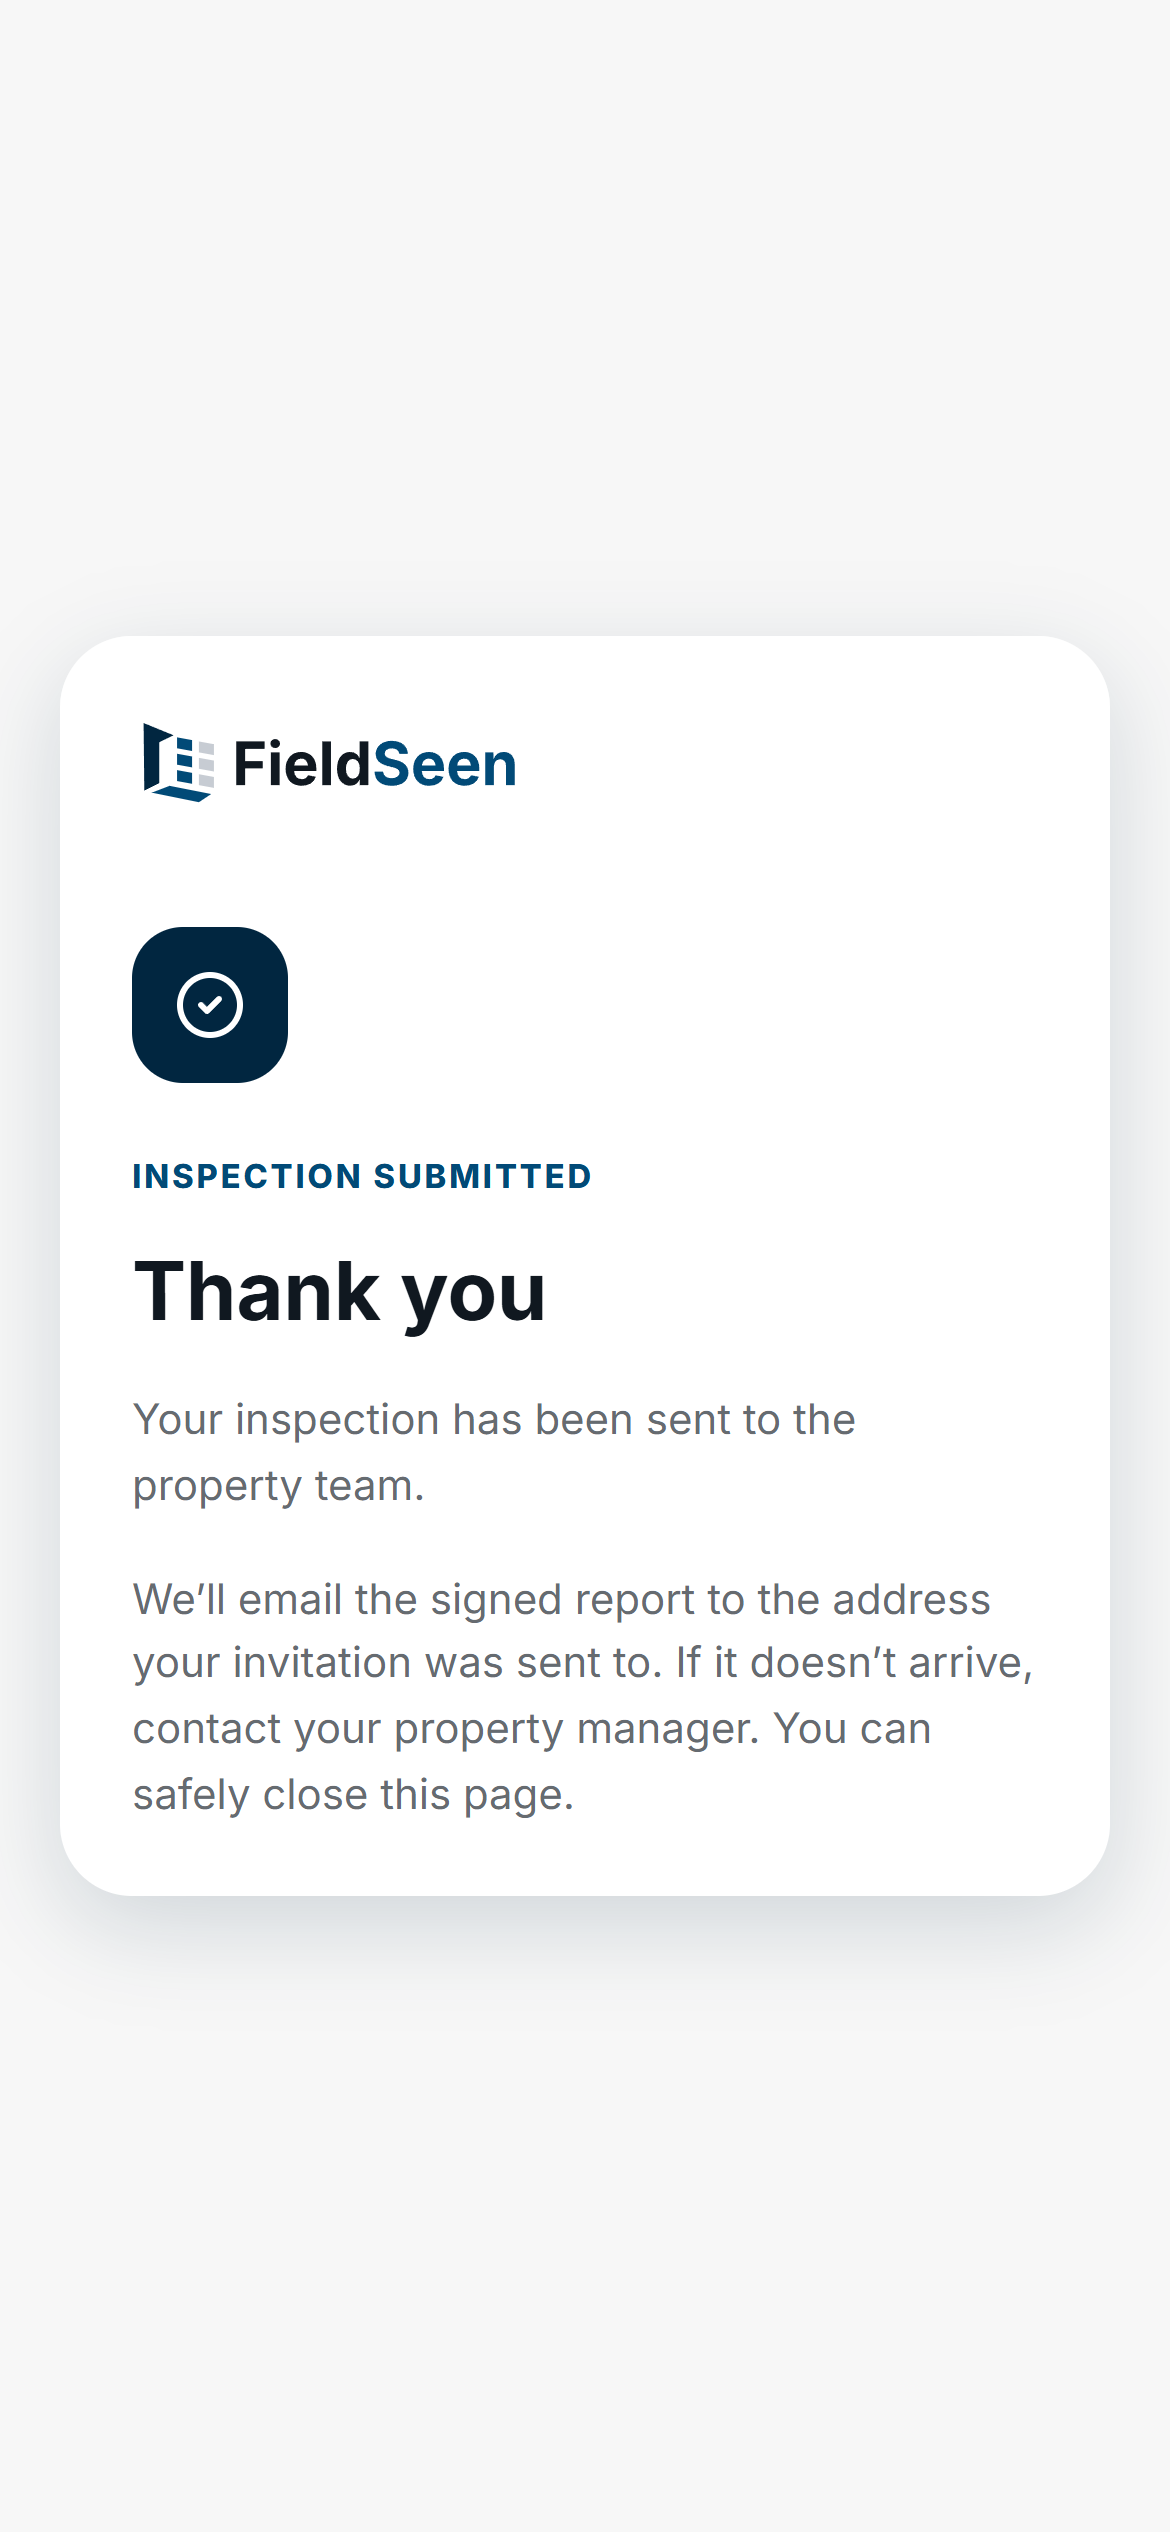
The confirmation explains that FieldSeen will email the signed report to the invited address when it is ready. It does not promise an immediate download or inbox delivery. The property team can review the completed record in inspection history with tenant attribution, keeping it distinct from a staff inspection.
Replace or revoke an invitation when needed
Invitations expire after 14 days. Return to the tenant's invitation to check its expiry date or Inspection in progress status. The current interface offers Revoke invitation for an active invitation, which stops that link from being used.
If you need a replacement invitation, revoke the active one, check the tenant contact and inspection type, and send a new invitation. There is no separate Resend control in this workflow. Coordinate with a tenant who has already started before replacing their link; do not assume work under the previous invitation will carry into a new inspection.
Find this workflow in the private tenant inspection link overview. If the inspection is already complete and you only need a receipt acknowledgment, use the tenant signing-link workflow instead. To request new evidence, open the property's tenant details and select Request tenant inspection.