
New feature
Create reusable inspection checklists in FieldSeen

Before you start
- Plan
- Free and Professional
- Works on
- Desktop and phone
- You’ll need
- Desktop to create it; in a company, an owner or admin role
Build a checklist once, then use it on your next inspection. FieldSeen lets you save rooms and items for move-in, routine, and move-out visits, so your inspectors have a consistent list to work through without rebuilding it each time.
This walkthrough shows how to create a checklist on desktop, use it during a visit on your phone or desktop, and review the answers afterward. The screenshots show the current checklist controls in an isolated demo with entirely fictional information.
Each personal or company workspace can save one checklist per inspection type. In a company, owners and admins manage checklists; employees use them during inspections. Creating and editing a checklist requires desktop. You can use a saved checklist on your phone.
Create your checklist on desktop
5 steps Desktop
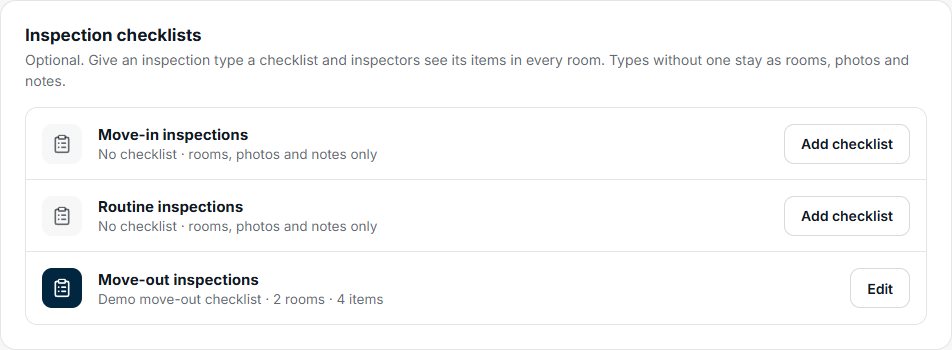
- Open Profile, then select Checklists.
- Find Move-in inspections, Routine inspections, or Move-out inspections and select Add checklist. If one already exists, select Edit.
- Give it a clear Checklist name. Choose Common rooms for a ready-made starting point or Blank checklist to build your own. You can also copy an existing checklist for another inspection type.
- Edit the room names and items. Use Add room and Add item where needed, and the arrow controls to put them in your preferred order.
- Select Save checklist. Your checklist now appears under that inspection type.
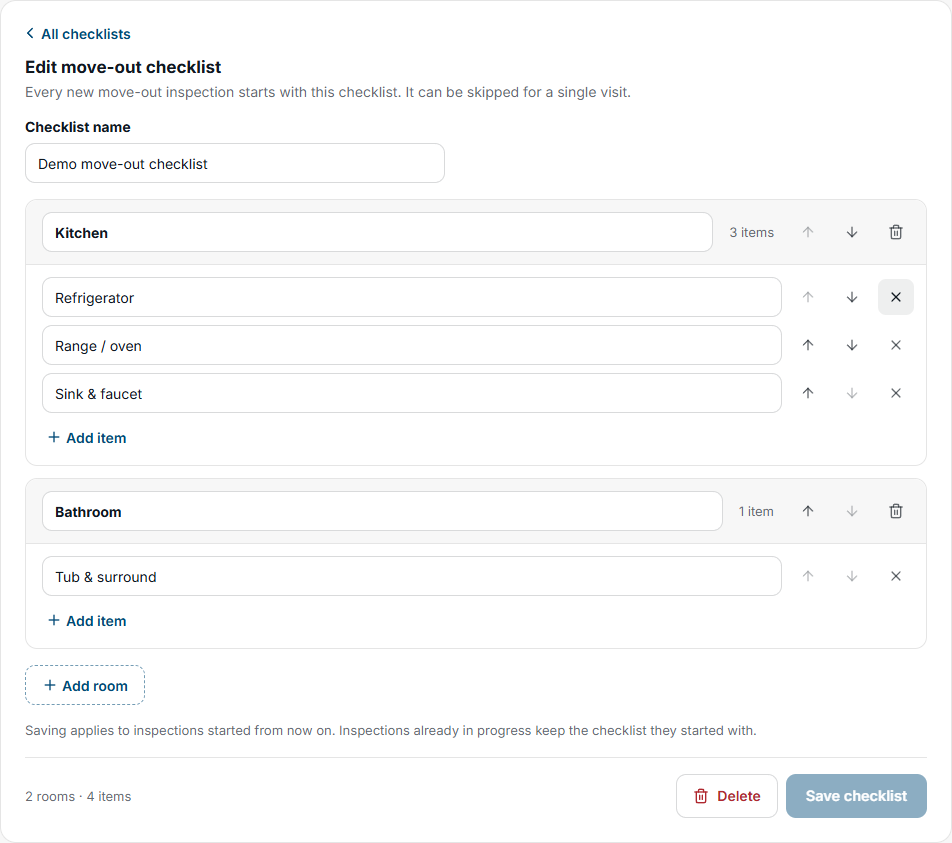
Keep each item specific enough to answer. For example, a kitchen list could include Refrigerator, Range / oven, and Sink & faucet. Adjust the list to the properties you inspect. A checklist is a prompt to document what you observe, not a substitute for photos or detailed notes.
Use it during an inspection
3 steps Phone or desktop
- Open the property and start a new inspection.
- Choose the inspection type that has your checklist. Check the displayed checklist name and rooms.
- Leave the checklist enabled and select Start inspection. FieldSeen creates the draft with those rooms and their items.
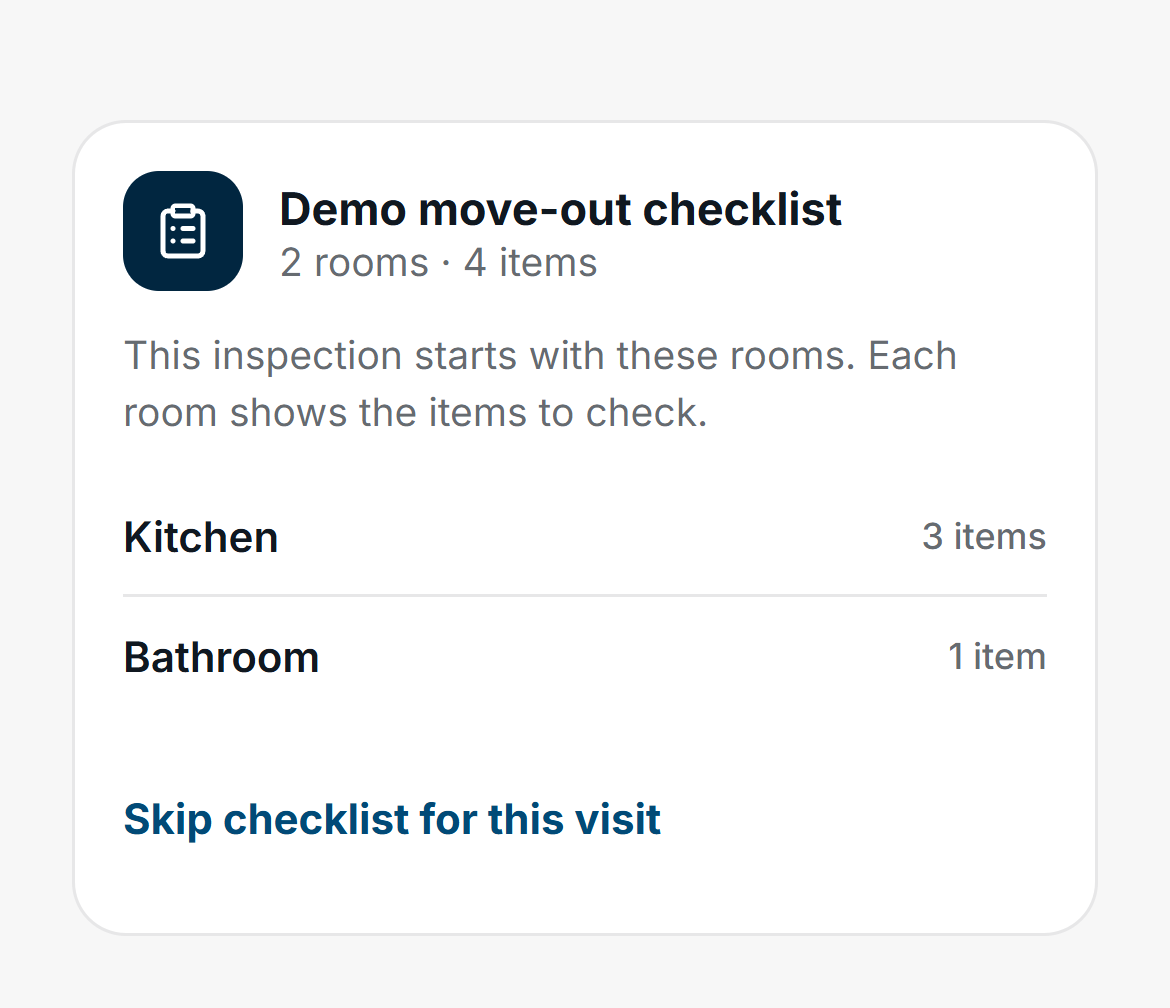
For a visit that needs a different approach, select Skip checklist for this visit before starting. You will add rooms yourself without checklist items. Select Use the checklist if you change your mind before starting.
Open a room and answer each checklist item with OK, Issue, or N/A. Choose N/A when the item does not apply to that visit. When you choose Issue, add a note describing what you observed. The note is required and can contain up to 500 characters.
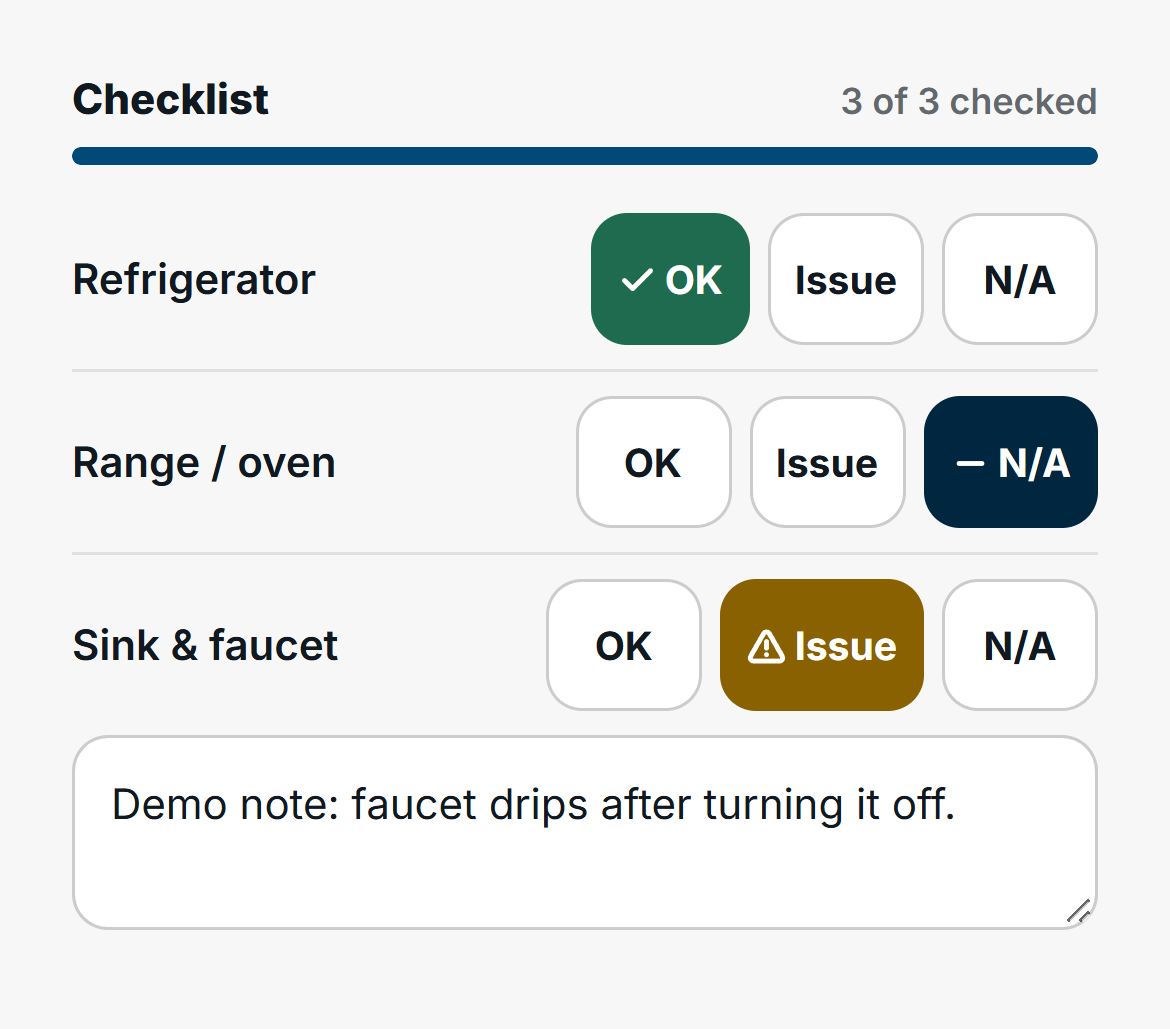
The same answers are available in the desktop room editor. Save the room after recording its condition, notes, photos, and checklist answers. Before finishing, answer every item in each inspected room. A room marked not inspected is exempt. A room you add by hand has no checklist items.
Review the completed results
After you finish the inspection, open its completed record and select a room to review the checklist answers and issue notes. The PDF report includes a checklist summary and the room-level answers, plus an Issues found page when issues are recorded.
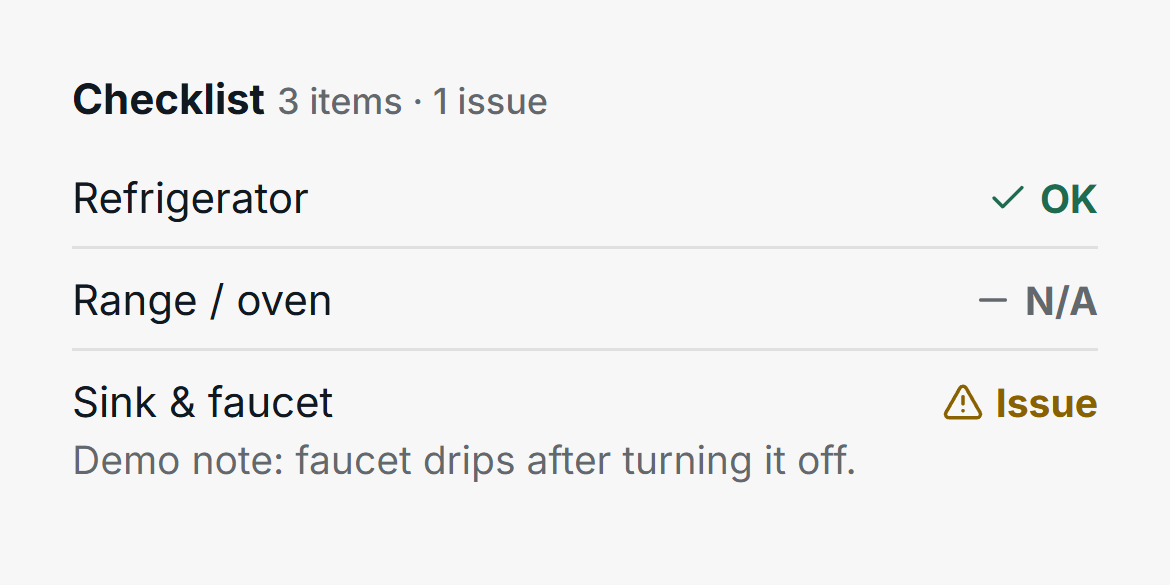
Write an issue note that someone else can act on. In this fictional example, “faucet drips after turning it off” is more useful than “sink issue.” Record supporting room photos when appropriate. Photos belong to the room, rather than individual checklist items.
Update the checklist for the next visit
Return to Profile > Checklists on desktop, select Edit, make your changes, and select Save checklist. Changes apply to inspections started afterward. An inspection already in progress or completed keeps the checklist it started with, even if you later edit or delete the reusable checklist.
Checklists are optional. Inspection types without one continue with rooms, photos, and notes. Accountless tenant inspections do not use these checklists. FieldSeen does not compare checklist answers between visits or require a photo for each item.
Need help deciding what belongs on the list? Use our routine rental inspection checklist or move-out inspection checklist to plan your next visit. Our move-in photo guide can help you capture useful supporting evidence.
To get started, open Profile > Checklists on desktop and create the list for your next inspection type. You can also find inspection checklists in our features overview.